FreeNAS .ISO Windows Rufus Bootable USB Install Guide
FreeNAS guide on “burning” the FreeNAS installation .ISO file onto a USB drive creating a bootable FreeNAS USB install stick.
This is not a complete FreeNAS install guide, but simply a 1st-step in the direction of getting FreeNAS onto your new DIY server.
Requirements
Operating System: Windows
Software Required: Rufus (Download Here)USB Memory: You need 1 USB stick to install FreeNAS from, and if you plan to install it on 2nd then you need a 2nd. Some people install FreeNAS on a SATADOM or SATA hard drive. As of FreeNAS 9.3 the minimum suggested boot device is 8gb.
I’ve had really good luck with Sandisk USB Flash Drives, and normally purchase them from amazon. The 8gb model works for installation, although may be harder to find now (2015). For $9 you can get a Sandisk UltraFIT (CZ43 16gb) or for $14 you get the 32gb model. These are micro flash drives and can read data at nearly 150MB/s and write around 40MB/s more than enough for an installation, and FreeNAS OS drive. Don’t worry, if top of the line is your thing you can spend upwards of $100 on a SLC industrial flash drive if you want the highest grade USB stick out there!
- The 1st step is to download FreeNAS .ISO file, and you can do that from FreeNAS themselves. (Download Here)
*Note* You will need to browse toward the bottom of the FreeNAS download page to find the “Installing FreeNAS?” box, and to the right is a large “Download” button. You do not want to download a nightly build. As of FreeNAS 9.3 (9/2015) the freeNAS downloadable .ISO file is approximately 400MB and depending on your internet connection speed may take minutes to an hour or so to download, don’t expect it to finish within seconds. - Download Rufus the software used to create the bootable USB flash drive creator. (Download Here)
- Once Rufus is downloaded run the software.
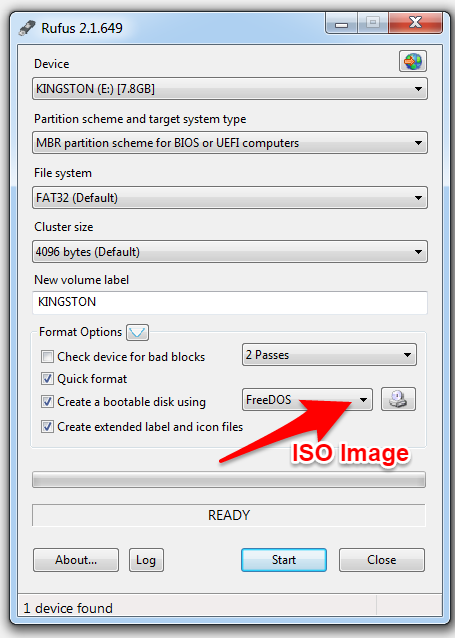
- (Within Rufus Software) Toward the bottom of the software is a drop down menu you want to change this from the default (FreeDOS) to “ISO IMAGE”.
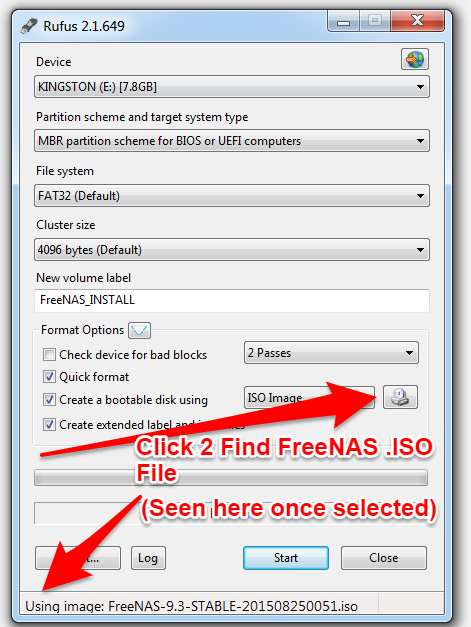
- (Within Rufus Software) Click the icon to the right of the drop down menu in step #4 and select the FreeNAS .iso file you downloaded in step #1.
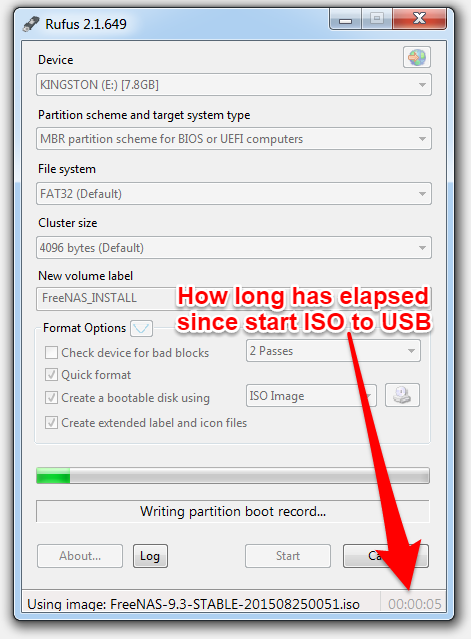
- (Within Rufus Software) Click the START Button (bottom middle)
- (Within Rufus Software) The bottom of the Rufus Software as you can see above will display the selected ISO image to use to create the bootable USB Flash Drive which in this case is FreeNAS, and once you click “START” as you did in step #6 the bottom of Rufus will display what’s going on as well as how long it’s been since you started the process of creating the FreeNAS USB Stick.
Once Rufus is complete you can remove your newly created FreeNAS bootable USB stick and install it in the computer/server you want to install, and run FreeNAS on. Keep in mind you cannot install FreeNAS onto itself (this same USB stick) and you will need a second USB Flash drive if you plan to run it “on USB”. Alternatives are to install FreeNAS onto SATA drives like a small SSD or a SATADOM. Like hard drives SSD and Flash drives have varying quality so try not to buy the cheapest, and whatever you do don’t buy one direct from china as many are known to be fake, and have a very very short life.